Crispy Cheese Shell Keto Tacos – Low-Carb Crunch With Big Flavor
If you miss the crunch of classic tacos while staying low-carb, these crispy cheese shell keto tacos bring it back in the best way. The “tortillas” are made from melted, golden cheese that firms up into a sturdy, savory shell. They’re fast to make, naturally gluten-free, and totally satisfying.
You’ll get that taco-night vibe without the carbs weighing you down. Load them with seasoned beef, chicken, or a veggie mix, and you’ve got a weeknight winner that tastes indulgent but keeps you on track.
Ingredients
Method
- Preheat and prep: Heat the oven to 375°F (190°C). Line two baking sheets with parchment paper or silicone mats. If using a skillet, set a nonstick pan over medium heat.
- Season the cheese: In a bowl, toss the shredded cheese with chili powder and garlic powder. This adds a little kick and boosts flavor.
- Form the shells: On the baking sheets, make 6–8 small mounds of cheese, about 1/3 cup each. Flatten into circles about 5–6 inches wide, leaving space between them. If using a skillet, sprinkle the cheese in a circle directly onto the pan.
- Bake or cook: Bake for 6–9 minutes, until the edges are deep golden and the center looks bubbly but not burnt. On the skillet, cook 3–4 minutes until the bottom is crisp and the top is melted.
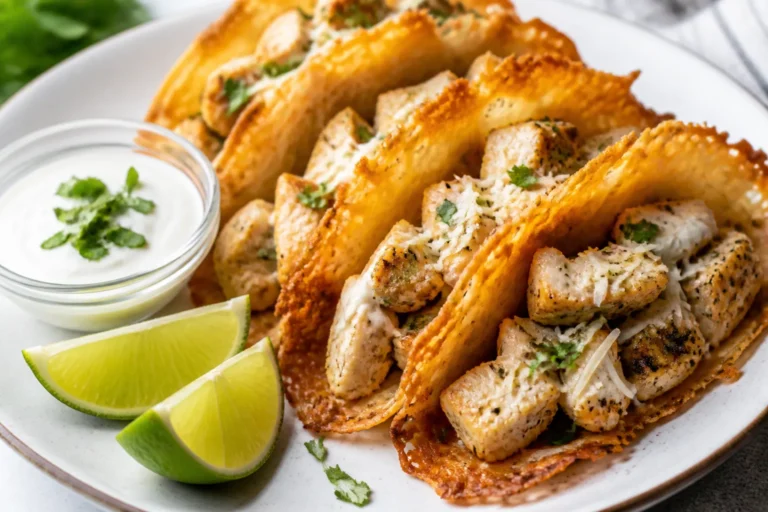
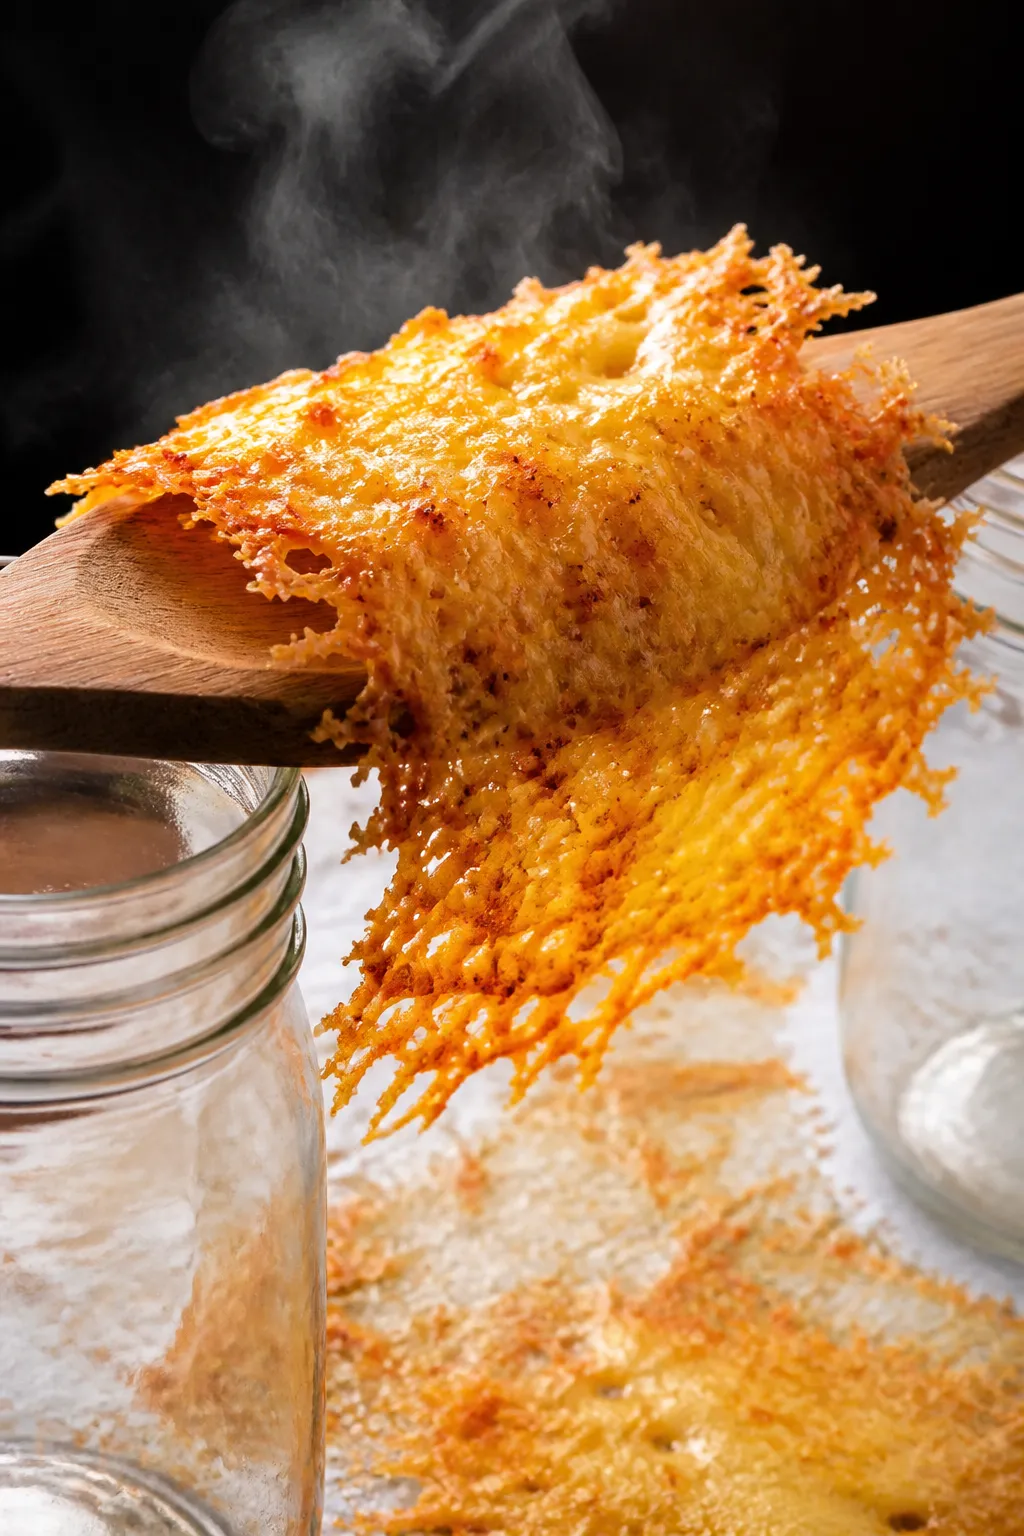
- Shape while warm: Let each cheese disk cool for 20–30 seconds, then drape it over a wooden spoon handle set across two jars, or over the edge of a bowl, to form a taco shape. Hold for a few seconds until it firms up. Work quickly—once the cheese cools, it won’t bend.
- Cook the filling: Brown the ground meat in a skillet over medium-high heat, breaking it up as it cooks. Drain excess fat if needed. Stir in taco seasoning and water, simmer 2–3 minutes until saucy and well coated.
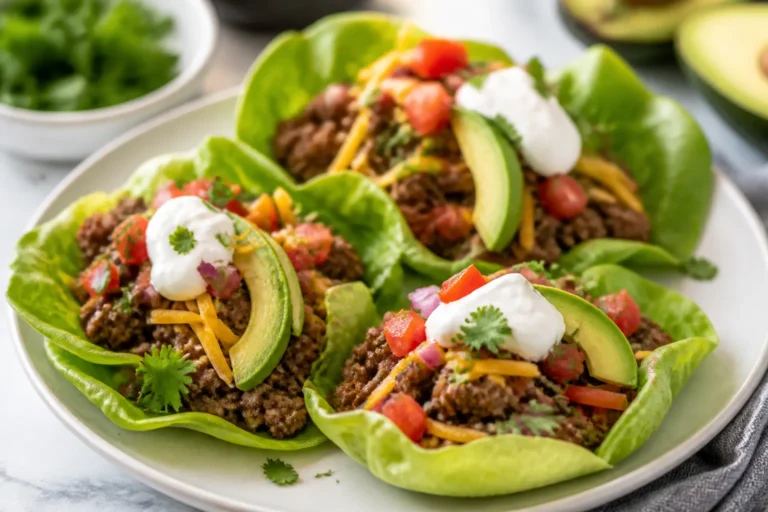
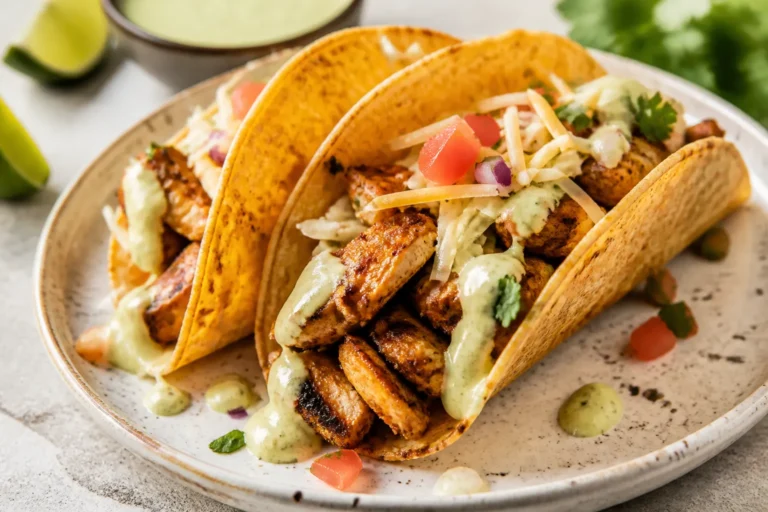
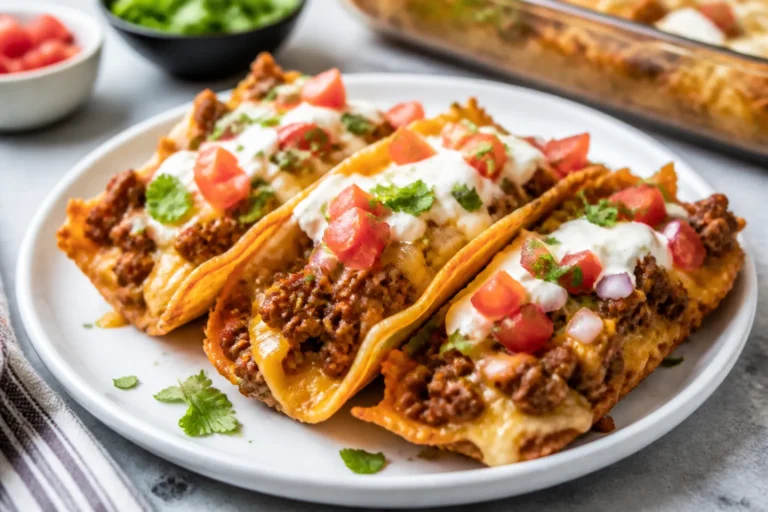
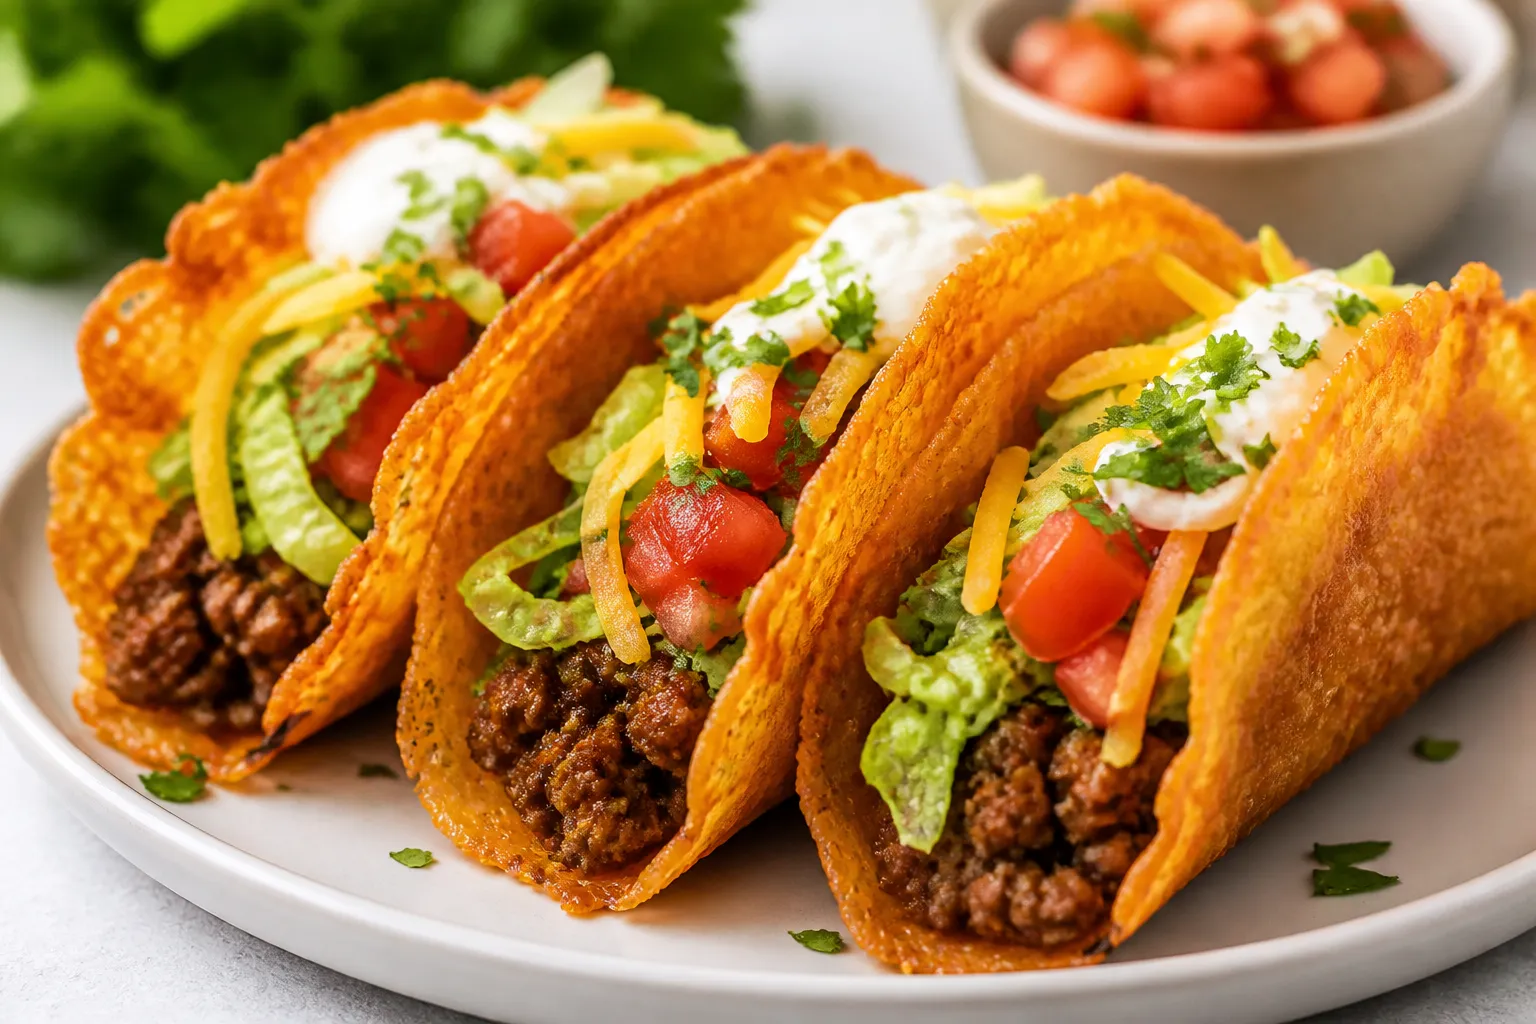
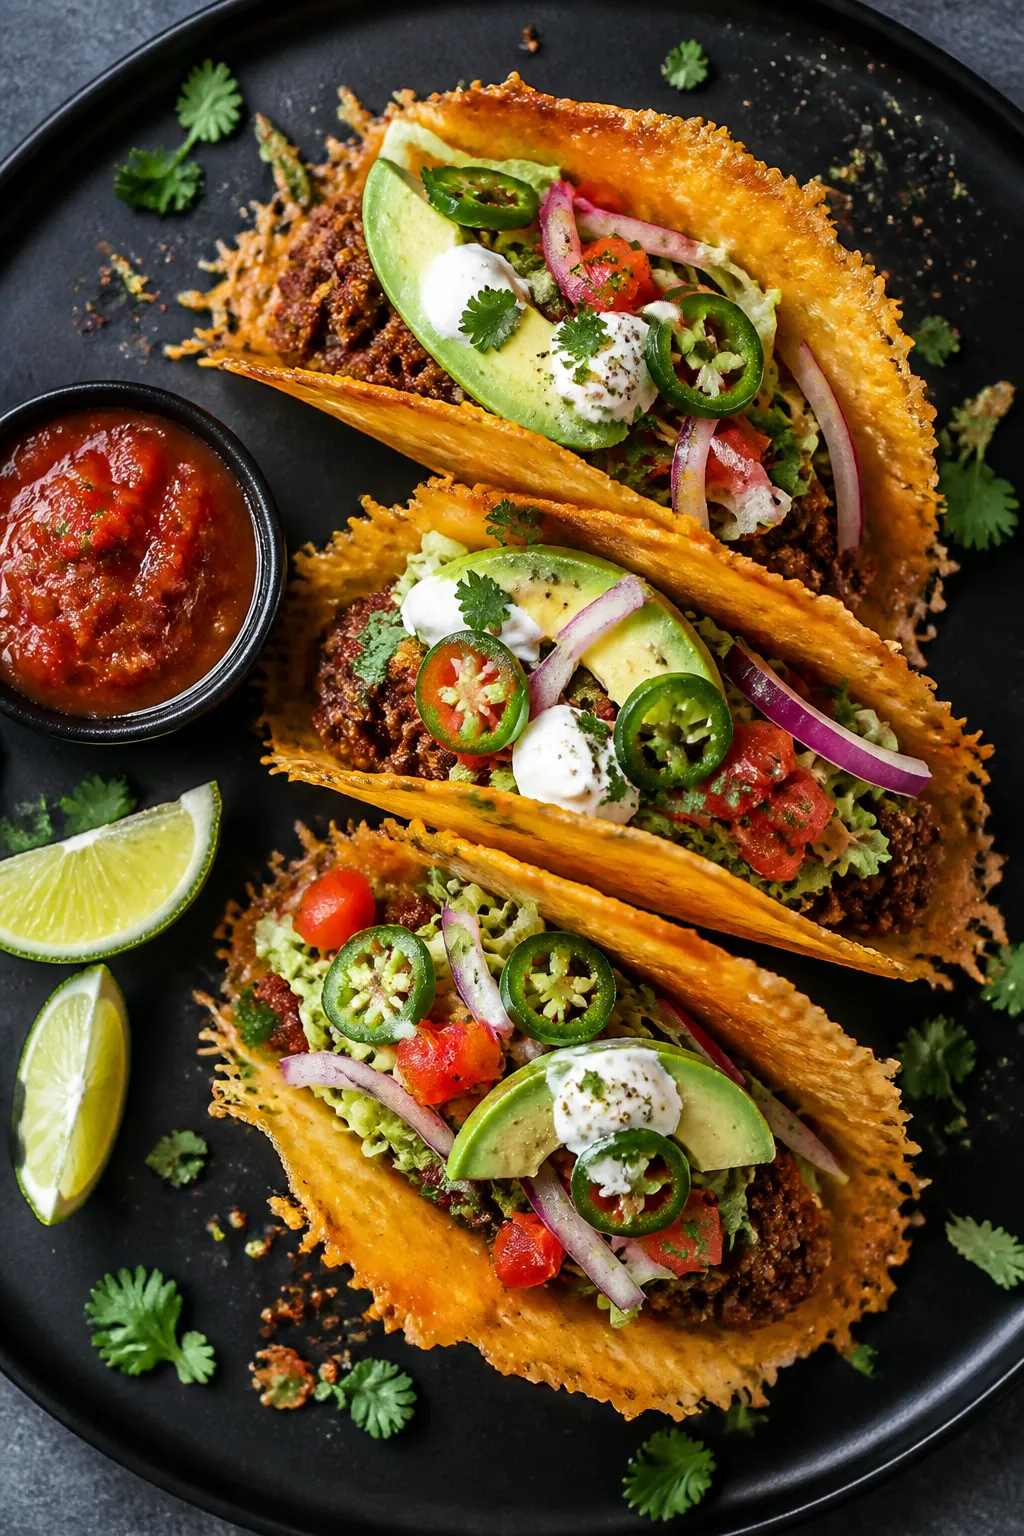
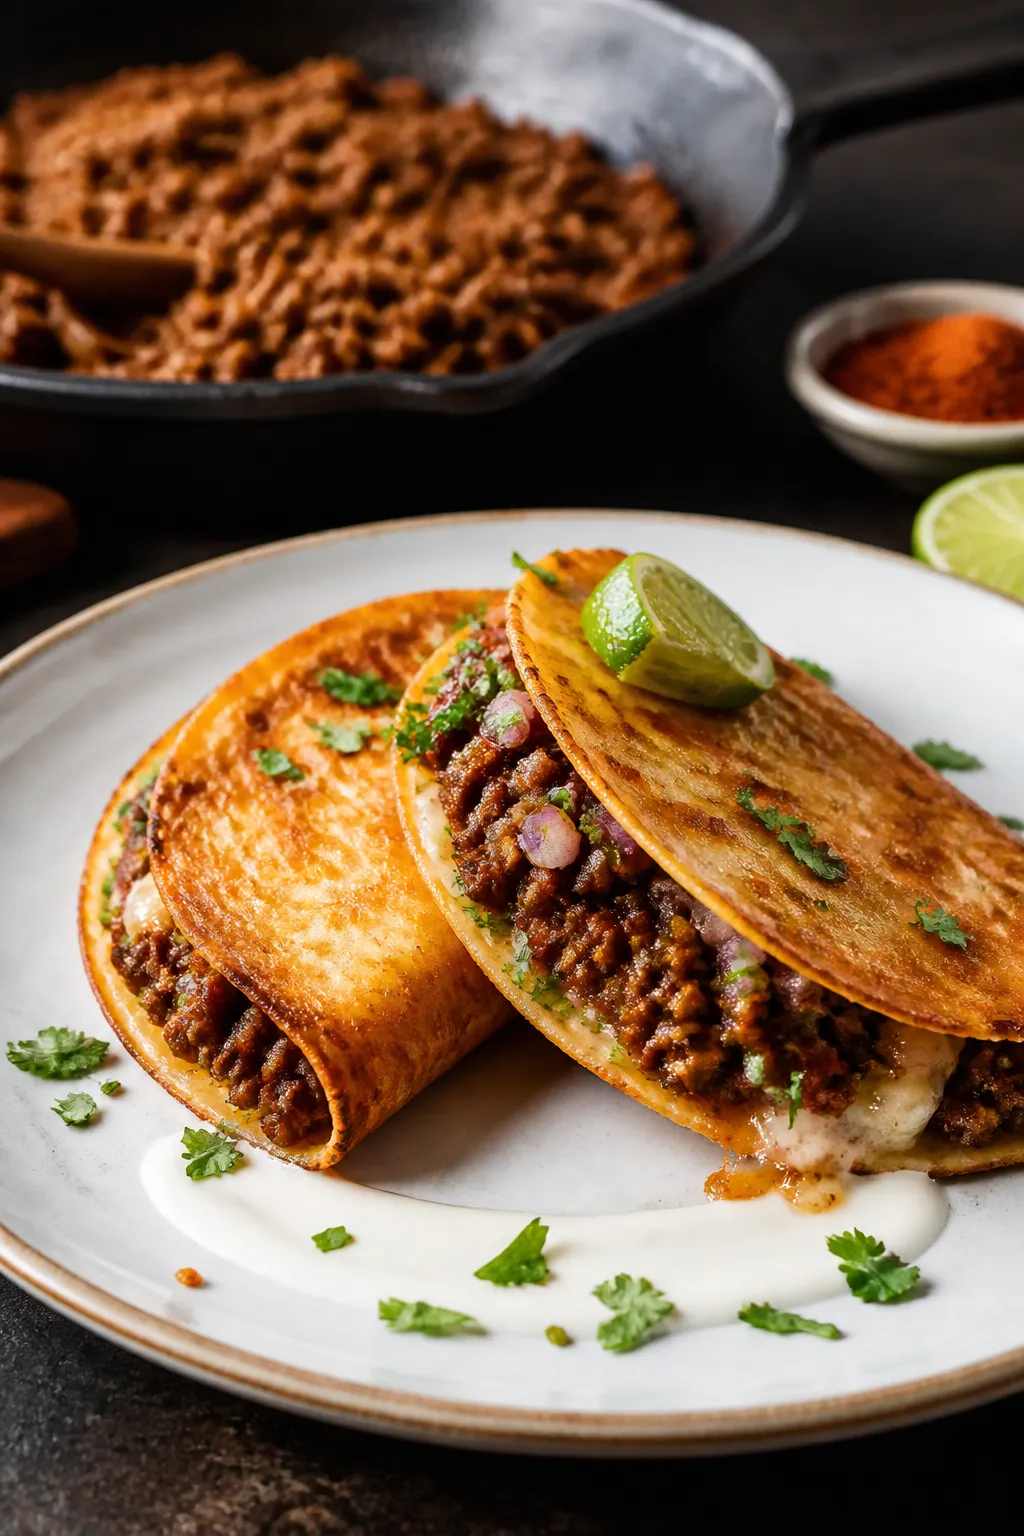
- Assemble: Fill each cheese shell with the seasoned meat. Add lettuce, tomatoes, onions, jalapeños, and your favorite sauces. Finish with cilantro and a squeeze of lime.
- Serve right away: Cheese shells taste best fresh while they’re crisp and warm.

What Makes This Special
This recipe flips the script by turning cheese into a crispy shell that actually holds up. It’s the perfect hack for keto eaters who still want texture and crunch.
The shells are ready in minutes, and you can make them in the oven or a skillet—no special tools required. Plus, you control the seasoning, the filling, and the spice level, so it fits your taste and your macros.
Ingredients
- For the Cheese Shells:
- 2 cups shredded cheese (cheddar, Mexican blend, or mozzarella)
- 1/2 teaspoon chili powder (optional)
- 1/4 teaspoon garlic powder (optional)
- Nonstick spray or parchment paper
- For the Taco Filling:
- 1 pound ground beef, turkey, or chicken
- 1 tablespoon taco seasoning (store-bought or homemade)
- 1/2 teaspoon salt, or to taste
- 1/4 cup water or broth (to help the seasoning coat)
- Toppings:
- Shredded lettuce or cabbage
- Diced tomatoes
- Diced red onion
- Sliced jalapeños
- Sour cream or Greek yogurt
- Avocado or guacamole
- Fresh cilantro
- Lime wedges
- Salsa or hot sauce
How to Make It
- Preheat and prep: Heat the oven to 375°F (190°C). Line two baking sheets with parchment paper or silicone mats.
If using a skillet, set a nonstick pan over medium heat.
- Season the cheese: In a bowl, toss the shredded cheese with chili powder and garlic powder. This adds a little kick and boosts flavor.
- Form the shells: On the baking sheets, make 6–8 small mounds of cheese, about 1/3 cup each. Flatten into circles about 5–6 inches wide, leaving space between them.
If using a skillet, sprinkle the cheese in a circle directly onto the pan.
- Bake or cook: Bake for 6–9 minutes, until the edges are deep golden and the center looks bubbly but not burnt. On the skillet, cook 3–4 minutes until the bottom is crisp and the top is melted.
- Shape while warm: Let each cheese disk cool for 20–30 seconds, then drape it over a wooden spoon handle set across two jars, or over the edge of a bowl, to form a taco shape. Hold for a few seconds until it firms up.
Work quickly—once the cheese cools, it won’t bend.
- Cook the filling: Brown the ground meat in a skillet over medium-high heat, breaking it up as it cooks. Drain excess fat if needed. Stir in taco seasoning and water, simmer 2–3 minutes until saucy and well coated.
- Assemble: Fill each cheese shell with the seasoned meat.
Add lettuce, tomatoes, onions, jalapeños, and your favorite sauces. Finish with cilantro and a squeeze of lime.
- Serve right away: Cheese shells taste best fresh while they’re crisp and warm.
How to Store
Cheese shells: Let them cool completely, then store in an airtight container with parchment between layers for up to 3 days in the fridge. To re-crisp, warm in a 350°F (175°C) oven for 3–4 minutes.
Skip the microwave—it softens them.
Filling: Store cooked meat in a sealed container in the fridge for up to 4 days, or freeze for up to 2 months. Reheat on the stove with a splash of water to bring back moisture.
Assembled tacos: Best eaten immediately. If you need to prep ahead, keep shells, fillings, and toppings separate until serving.
Health Benefits
- Low in carbs: Cheese shells remove the tortillas entirely, keeping net carbs very low and keto-friendly.
- High in protein: Ground meat and cheese combine to deliver a filling meal that curbs hunger and supports muscle maintenance.
- Rich in calcium and minerals: Cheese brings calcium, phosphorus, and fat-soluble vitamins, which support bone health.
- Customizable fats: Choose lean or higher-fat meats based on your macro goals.
Add avocado for fiber and heart-healthy fats.
- Gluten-free by default: Perfect for those avoiding gluten without sacrificing flavor or texture.
Pitfalls to Watch Out For
- Soggy shells: Overloading with wet toppings or not draining meat properly can soften the shells. Keep fillings relatively dry.
- Shells that crack: If the cheese cools too much before shaping, it can snap. Shape within 30–45 seconds of removing from heat.
- Burning the cheese: Deep brown is good; black is bitter.
Watch closely in the last minute—cheese goes from perfect to burnt fast.
- Excess sodium: Pre-shredded cheese and packaged seasonings can be salty. Balance with fresh toppings and consider homemade seasoning.
- Grease pools: Some cheeses release more oil. Dab shells with a paper towel after baking if they look oily.
Recipe Variations
- Chicken fajita tacos: Use sliced sautéed chicken with bell peppers and onions.
Season with cumin, chili powder, and lime.
- Spicy chorizo: Cook chorizo and fold in a spoon of tomato paste for richness. Top with avocado and fresh radish slices.
- Veggie and egg: Scramble eggs with sautéed spinach, mushrooms, and pepper jack. Great for a brunch taco.
- BBQ beef: Toss shredded beef with sugar-free BBQ sauce.
Add slaw for crunch and a tangy bite.
- Surf and turf: Combine seared shrimp with seasoned ground beef. Finish with crema and lime zest.
- Different cheeses: Try cheddar for sharpness, Monterey Jack for mild melt, or Parmesan for extra-crisp shells. Mix for flavor and texture.
- Mini party tacos: Make 3-inch shells for bite-sized appetizers.
They hold up well and look great on a platter.
FAQ
Which cheese works best for the shells?
Use cheeses that melt evenly and crisp up, like cheddar, mozzarella, Monterey Jack, or a Mexican blend. Avoid very soft cheeses like brie, and keep blue cheese to a crumble in the filling, not the shell.
Can I make the shells on the stovetop?
Yes. Use a nonstick skillet over medium heat.
Sprinkle cheese in a 5–6 inch circle and cook until the edges brown and the center bubbles. Lift carefully, shape, and let it set.
How do I prevent the shells from sticking?
Use parchment paper or a silicone mat when baking. For stovetop cooking, use a well-seasoned nonstick pan and avoid moving the cheese until it releases naturally.
Are these tacos actually crunchy?
Yes, if you cook the cheese to a golden brown and let it cool slightly before shaping.
The shells firm up as they cool and stay crispy if you add fillings right before serving.
What’s a good homemade taco seasoning?
Mix 1 tablespoon chili powder, 1 teaspoon cumin, 1 teaspoon paprika, 1/2 teaspoon garlic powder, 1/2 teaspoon onion powder, 1/2 teaspoon oregano, 1/4 teaspoon cayenne (optional), and 1 teaspoon salt. Adjust heat to taste.
Can I make them dairy-free?
Dairy-free shreds vary a lot. Some melt but don’t crisp well.
If you try, bake longer at a slightly lower temperature, and test a small batch first. Results will differ by brand.
How many carbs are in these tacos?
It depends on your toppings, but the cheese shell itself typically has about 1–2 grams net carbs per shell. Track your add-ins to keep macros in check.
Do the shells reheat well?
They’re best fresh.
If needed, reheat in a 350°F (175°C) oven for a few minutes to re-crisp. Avoid the microwave, which makes them soft and chewy.
What if my shells won’t hold their shape?
They may be undercooked or too thick. Cook until deeply golden and make thinner circles.
Shape quickly while warm using a spoon handle or the edge of a bowl.
Can I freeze the shells?
You can, but texture suffers. If you must, separate with parchment and freeze flat. Re-crisp in the oven from frozen.
Fresh-made shells have the best crunch.
In Conclusion
Crispy cheese shell keto tacos deliver that classic taco crunch with a low-carb twist. They’re quick to make, big on flavor, and easy to customize for any crowd. Keep the shells crisp, the fillings simple, and the toppings fresh, and you’ll have a reliable, repeatable taco-night favorite.
Once you try them, you’ll wonder why you ever needed tortillas at all.
Printable Recipe Card
Want just the essential recipe details without scrolling through the article? Get our printable recipe card with just the ingredients and instructions.