High Protein Chocolate Mousse Cups – Creamy, Light, and Satisfying
This high protein chocolate mousse tastes like a decadent dessert but works just as well as a snack or make-ahead breakfast. It’s fluffy, deeply chocolatey, and surprisingly simple to make. You’ll blend a few everyday ingredients, spoon them into cups, and chill.
No fancy techniques, no baking, and no weird aftertastes. Just a smooth, rich mousse that’s secretly loaded with protein.
Ingredients
Method
- Melt the chocolate: Place the chopped dark chocolate in a microwave-safe bowl and heat in 20–30 second bursts, stirring between each, until smooth. Set aside to cool for 2–3 minutes so it’s warm but not hot.
- Blend the base: In a blender or food processor, add Greek yogurt, chocolate protein powder, cocoa powder, milk (start with 1/3 cup), vanilla, sweetener, and a pinch of salt. Blend until silky, scraping down the sides as needed. The texture should be thick but pourable.
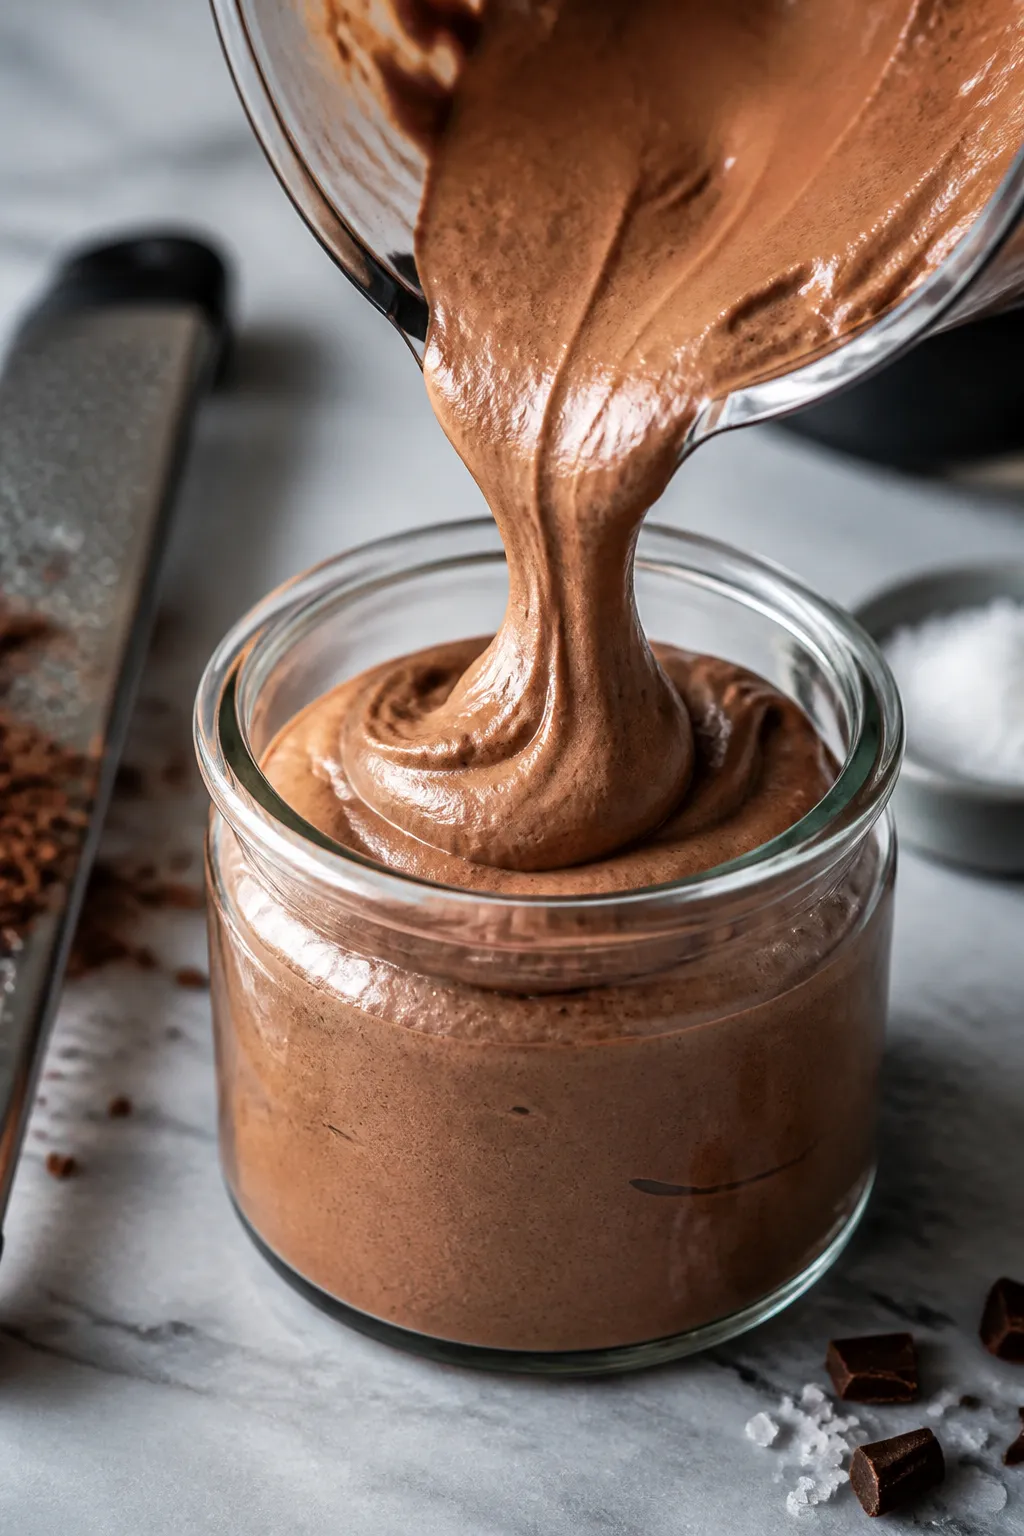
- Add melted chocolate: With the blender running on low, stream in the melted chocolate. Blend just until fully incorporated. This step adds body and a glossy finish.
- Adjust consistency and sweetness: If the mousse is too thick, add another splash of milk. Taste and adjust sweetener. If it tastes flat, a tiny extra pinch of salt brightens the chocolate.
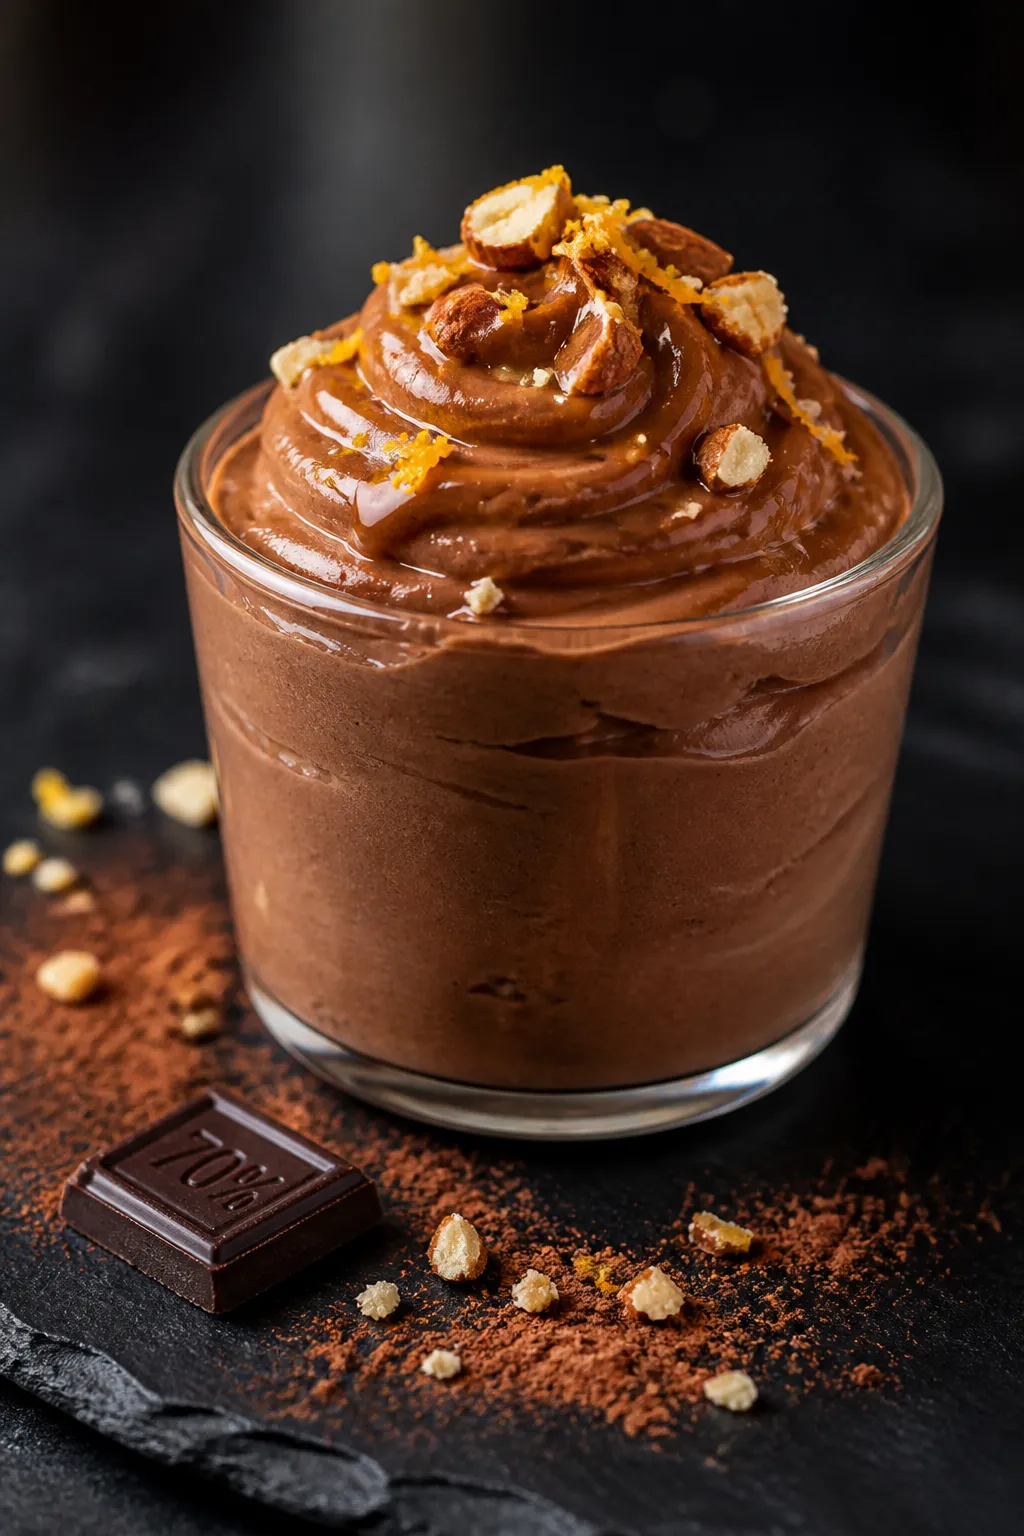
- Optional flavor boosts: Pulse in 1–2 teaspoons espresso powder for depth, a swipe of orange zest for brightness, or 2 tablespoons nut butter for extra richness.
- Portion and chill: Spoon the mousse into 4–6 small cups or jars. Cover and refrigerate for at least 1 hour, ideally 2–4 hours, to set and develop flavor.
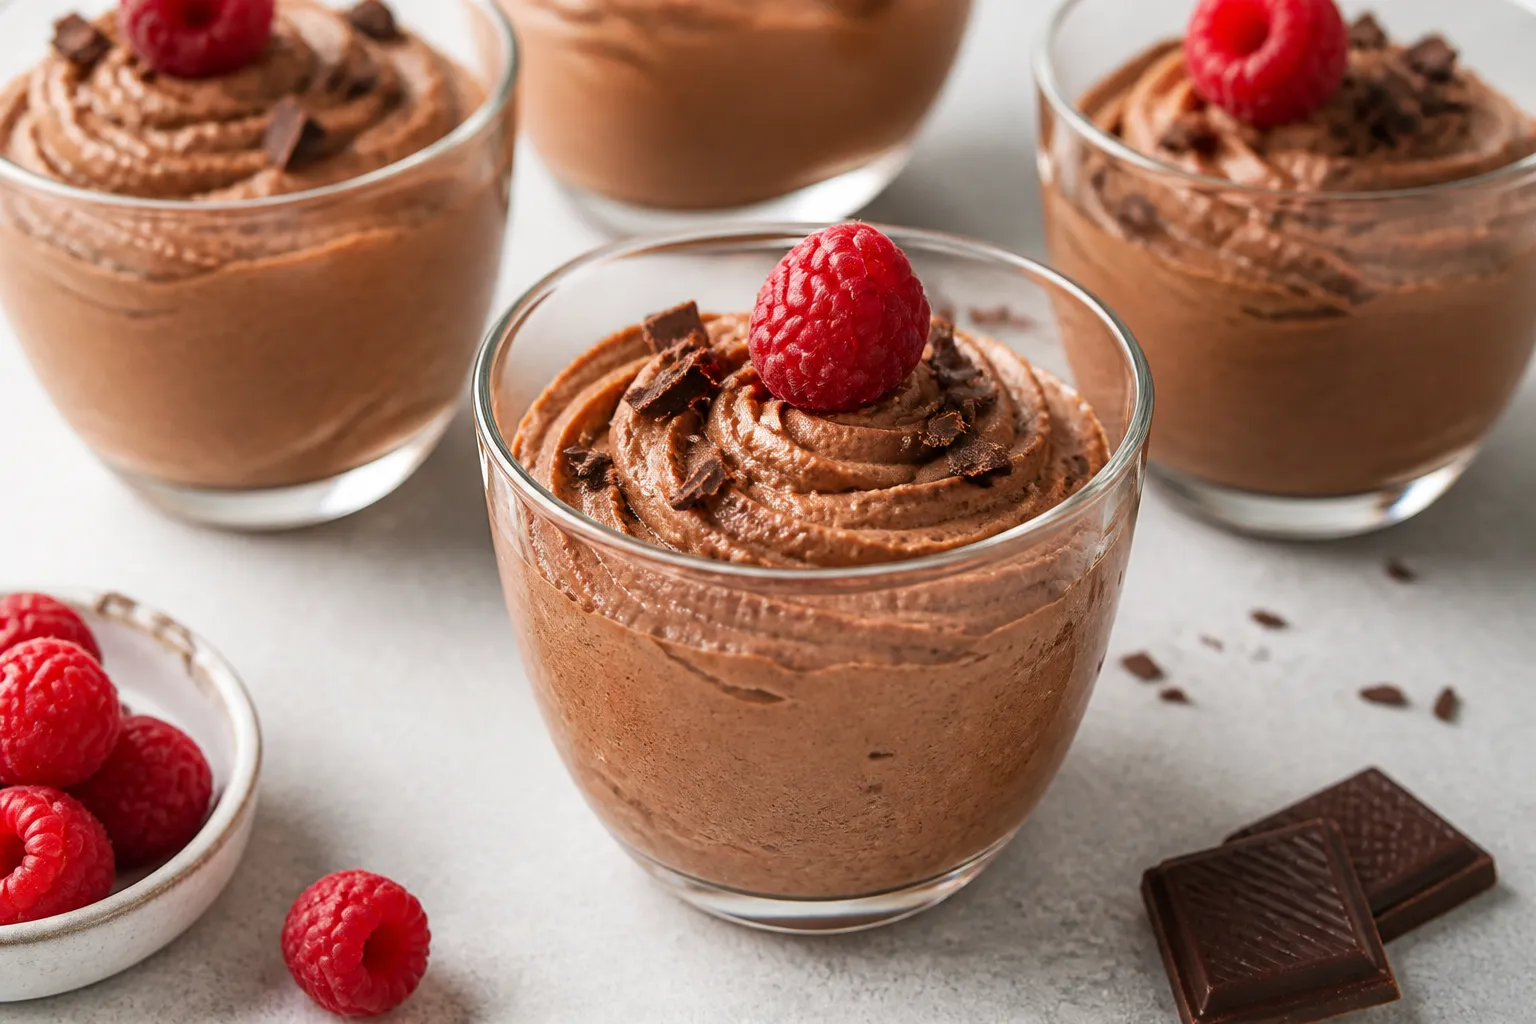
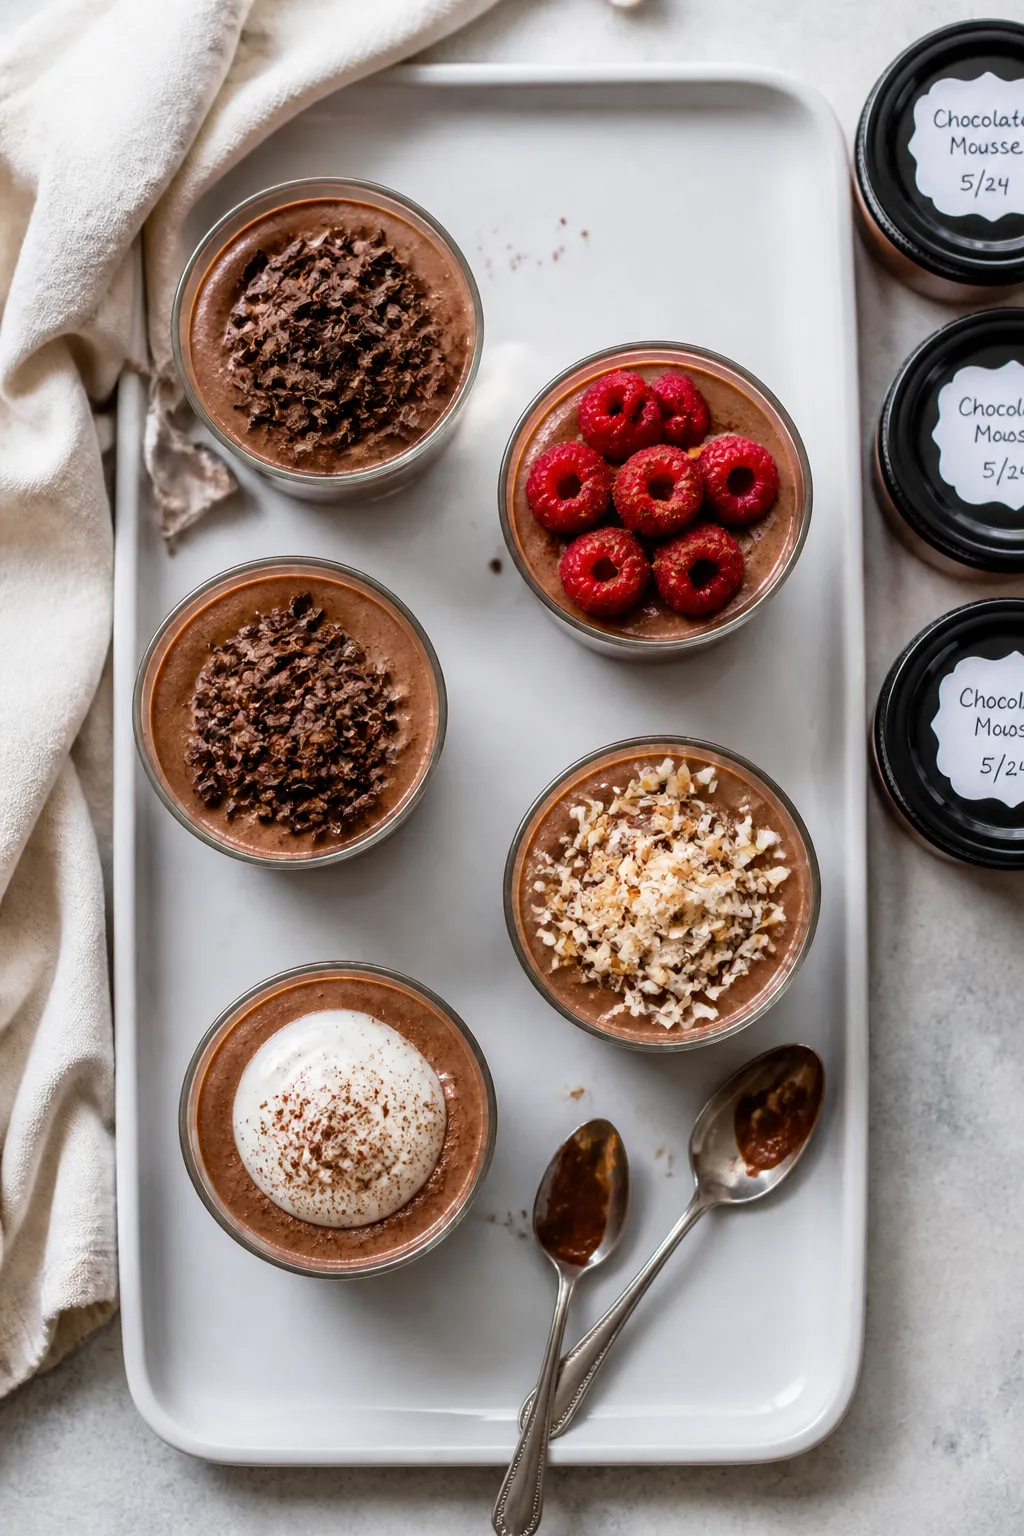
- Garnish and serve: Top with shaved chocolate, berries, or cocoa nibs right before serving. Enjoy cold.

What Makes This Recipe So Good
- Big chocolate flavor, light texture: Cocoa powder and melted dark chocolate give you depth and richness, while Greek yogurt keeps it airy and creamy.
- Serious protein: Each cup packs 15–25 grams of protein depending on your protein powder and yogurt, making it a smart choice for post-workout or dessert.
- Quick and foolproof: Blend, fold, chill. No whipping egg whites or tempering anything.
- Flexible sweetness: Use maple syrup, honey, or a zero-calorie sweetener—whatever suits your goals.
- Make-ahead friendly: Set them up in jars or cups and keep them in the fridge for the week.
Shopping List
- Plain Greek yogurt (2% or 0%): 2 cups, cold
- Chocolate protein powder: 2 scoops (about 50–60 g total)
- Unsweetened cocoa powder: 3 tablespoons, sifted
- Dark chocolate (60–70%): 2 ounces, chopped and melted
- Milk of choice: 1/3 to 1/2 cup (dairy, almond, or oat)
- Sweetener: 2–4 tablespoons maple syrup, honey, or granulated/zero-calorie sweetener to taste
- Vanilla extract: 1 teaspoon
- Fine sea salt: A pinch
- Optional add-ins: 2 tablespoons almond butter or peanut butter; espresso powder; orange zest
- Optional toppings: Shaved chocolate, cocoa nibs, fresh berries, toasted coconut, crushed nuts, or a dollop of yogurt
How to Make It
- Melt the chocolate: Place the chopped dark chocolate in a microwave-safe bowl and heat in 20–30 second bursts, stirring between each, until smooth.
Set aside to cool for 2–3 minutes so it’s warm but not hot.
- Blend the base: In a blender or food processor, add Greek yogurt, chocolate protein powder, cocoa powder, milk (start with 1/3 cup), vanilla, sweetener, and a pinch of salt. Blend until silky, scraping down the sides as needed. The texture should be thick but pourable.
- Add melted chocolate: With the blender running on low, stream in the melted chocolate.
Blend just until fully incorporated. This step adds body and a glossy finish.
- Adjust consistency and sweetness: If the mousse is too thick, add another splash of milk. Taste and adjust sweetener.
If it tastes flat, a tiny extra pinch of salt brightens the chocolate.
- Optional flavor boosts: Pulse in 1–2 teaspoons espresso powder for depth, a swipe of orange zest for brightness, or 2 tablespoons nut butter for extra richness.
- Portion and chill: Spoon the mousse into 4–6 small cups or jars. Cover and refrigerate for at least 1 hour, ideally 2–4 hours, to set and develop flavor.
- Garnish and serve: Top with shaved chocolate, berries, or cocoa nibs right before serving. Enjoy cold.
Storage Instructions
- Fridge: Store covered for 4–5 days.
The texture stays stable and creamy.
- Freezer: Freeze up to 2 months. Thaw overnight in the fridge, then whisk briefly. Or eat slightly frozen for a fudgy, ice-cream-like treat.
- Meal prep tip: Portion into small lidded jars.
Label with date and protein count if you track macros.
Benefits of This Recipe
- High protein, lower sugar: You control the sweetener and can use low- or no-calorie options without sacrificing texture.
- Satiating fats and probiotics: Greek yogurt brings calcium and live cultures; a touch of dark chocolate adds polyphenols.
- Customizable for goals: Use 0% yogurt for a leaner option or 2% for extra creaminess and fullness.
- Minimal equipment, maximum payoff: A blender does the heavy lifting. No stand mixer needed.
What Not to Do
- Don’t add hot chocolate to cold yogurt: Very hot melted chocolate can seize or create graininess. Let it cool slightly first.
- Don’t skip the salt: A small pinch enhances chocolate flavor.
Without it, the mousse can taste dull.
- Don’t over-thin: Add milk gradually. Too much will make it soupy and it won’t set nicely.
- Don’t use chalky protein powder: If yours tastes artificial, the mousse will too. Choose a brand you like mixed with just water or milk.
- Don’t expect instant set: It needs at least an hour in the fridge for the best texture.
Alternatives
- Dairy-free: Swap Greek yogurt for a thick coconut yogurt and use plant-based protein powder and non-dairy milk.
Note the flavor will be slightly coconut-forward.
- No added sugar: Use a stevia or monk fruit blend. Start small and taste as you go.
- Protein options: Whey gives the fluffiest texture, casein makes it thicker, and plant-based powders can be denser. Adjust milk to balance thickness.
- Flavor twists: Mint extract (just a drop or two), cinnamon and cayenne for Mexican chocolate vibes, or hazelnut butter for “gianduja” style.
- Topping swaps: Raspberries, sliced strawberries, a dusting of cocoa, or a sprinkle of granola for crunch.
FAQ
How much protein is in each cup?
It depends on your protein powder and portion size.
With two scoops of whey (50–60 g) and 2 cups of nonfat Greek yogurt, four servings usually land around 18–24 grams of protein each. If you make six smaller cups, expect 12–18 grams per cup.
Can I make it without protein powder?
Yes. Increase cocoa to 4 tablespoons and add an extra 1/2 cup Greek yogurt.
You may need a bit more sweetener. The texture stays creamy, but total protein will be lower.
Why is my mousse grainy?
Your chocolate may have been too hot, or the cocoa powder wasn’t sifted. Blend longer, add 1–2 tablespoons milk, and let it chill.
Next time, cool the melted chocolate slightly and sift dry ingredients first.
Can I use regular yogurt instead of Greek yogurt?
You can, but it’s thinner and tangier. Strain it through a fine mesh sieve lined with a towel for 2–3 hours to remove excess whey, or reduce the milk in the recipe to keep the mousse thick.
Is this safe for kids?
Generally yes, though the caffeine in dark chocolate and cocoa is minimal. If you’re using zero-calorie sweeteners, choose ones your family tolerates well.
For toddlers, consider using honey or maple and a mild protein powder.
Can I prep this ahead for guests?
Absolutely. Make it the day before and garnish right before serving. The flavors meld overnight, and the texture turns ultra-smooth.
What if I don’t have a blender?
Use a whisk and some patience.
Sift the cocoa and protein powder, then whisk everything in a large bowl. Melted chocolate should be whisked in slowly. The texture may be slightly less airy but still delicious.
Can I turn this into a pie?
Yes.
Spoon the mousse into a prepared graham cracker or Oreo crust and chill 4–6 hours. Top with shaved chocolate and berries before serving.
Final Thoughts
High Protein Chocolate Mousse Cups give you the best of both worlds: a dessert-level treat with a macro-friendly profile. The method is simple, the ingredients are flexible, and the results feel special enough for guests yet easy enough for a Tuesday night.
Keep a batch in the fridge, switch up toppings, and make it your own. Once you lock in your favorite protein powder and sweetness level, this will be a regular in your rotation.
Printable Recipe Card
Want just the essential recipe details without scrolling through the article? Get our printable recipe card with just the ingredients and instructions.