Keto Taco Cups With Cheese Shells – A Crunchy, Low-Carb Favorite
These keto taco cups hit all the cravings without the carbs. They’re crispy, cheesy, and loaded with bold taco flavor in every bite. Think of them as mini tacos that are fun to make and easy to serve, whether it’s a weeknight dinner or a game-day snack.
You get the crunch from baked cheese shells and the comfort of a juicy, well-seasoned filling. It’s a crowd-pleaser that also happens to be low-carb and gluten-free.
Ingredients
Method
- Preheat the oven: Set it to 375°F (190°C). Lightly grease a standard muffin tin.
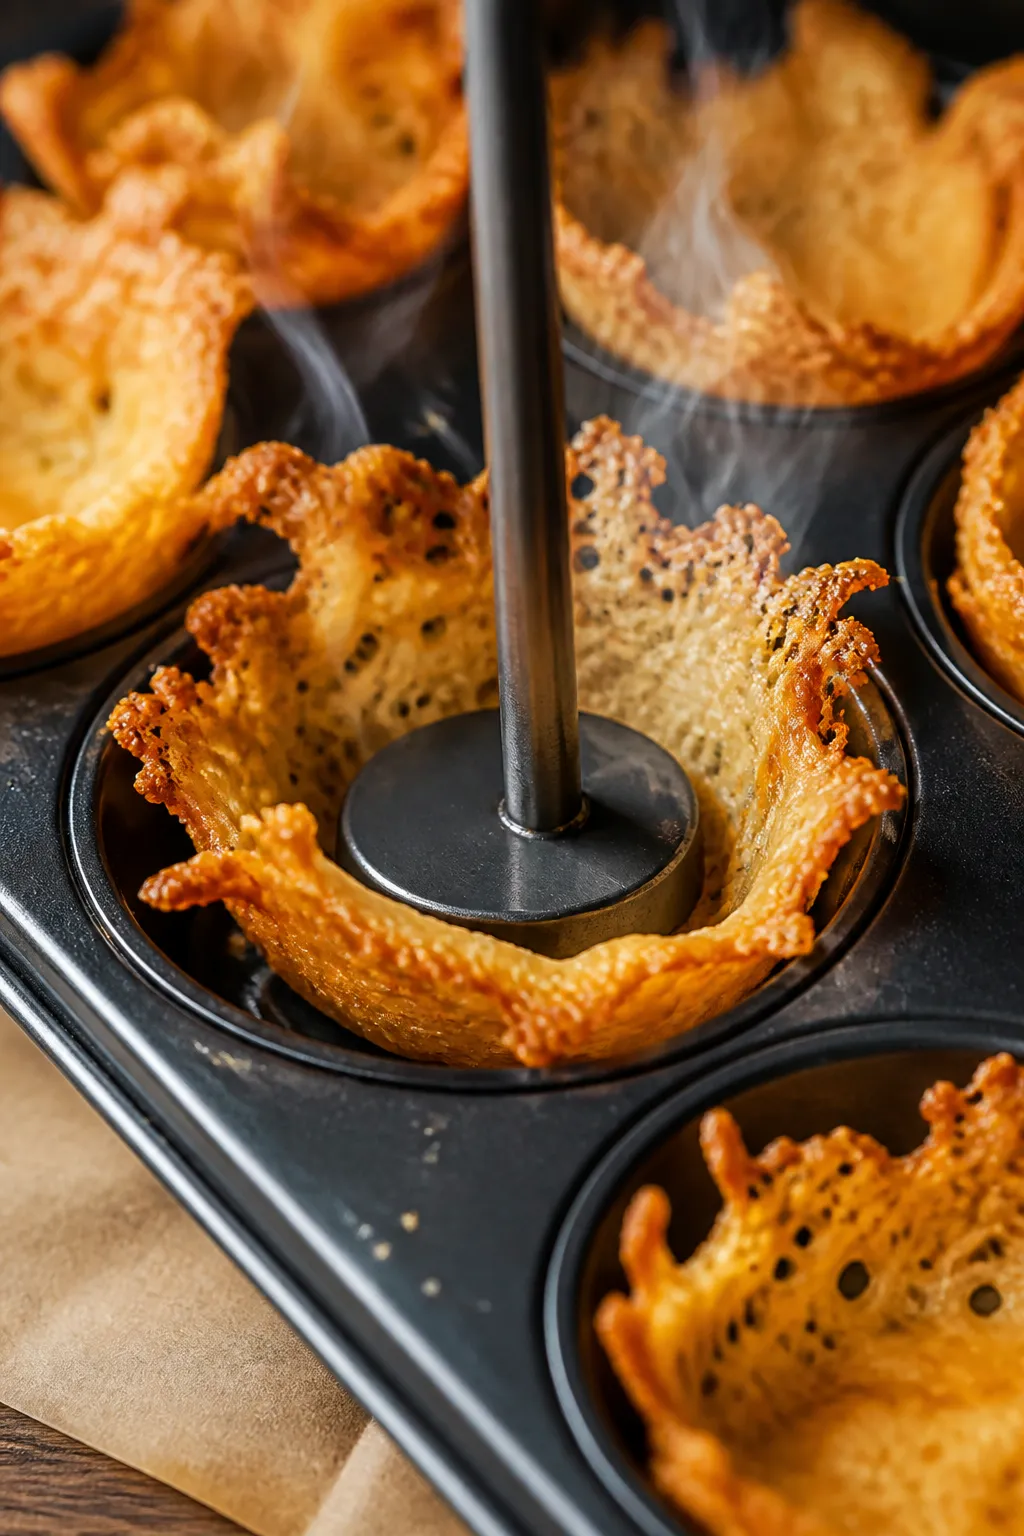
- Form the cheese rounds: On a parchment-lined baking sheet, make 12 small mounds of cheese (about 2 tablespoons each). Flatten slightly into 3-inch circles.
- Bake the cheese: Bake for 6–8 minutes until the edges are deep golden and the centers are bubbly. They should look lacy and crisp around the edges.
- Shape the cups: Let the cheese rounds cool for 30–45 seconds to firm up, then quickly lift each one and press into the muffin tin wells to form cups. Let them cool in the tin until firm.
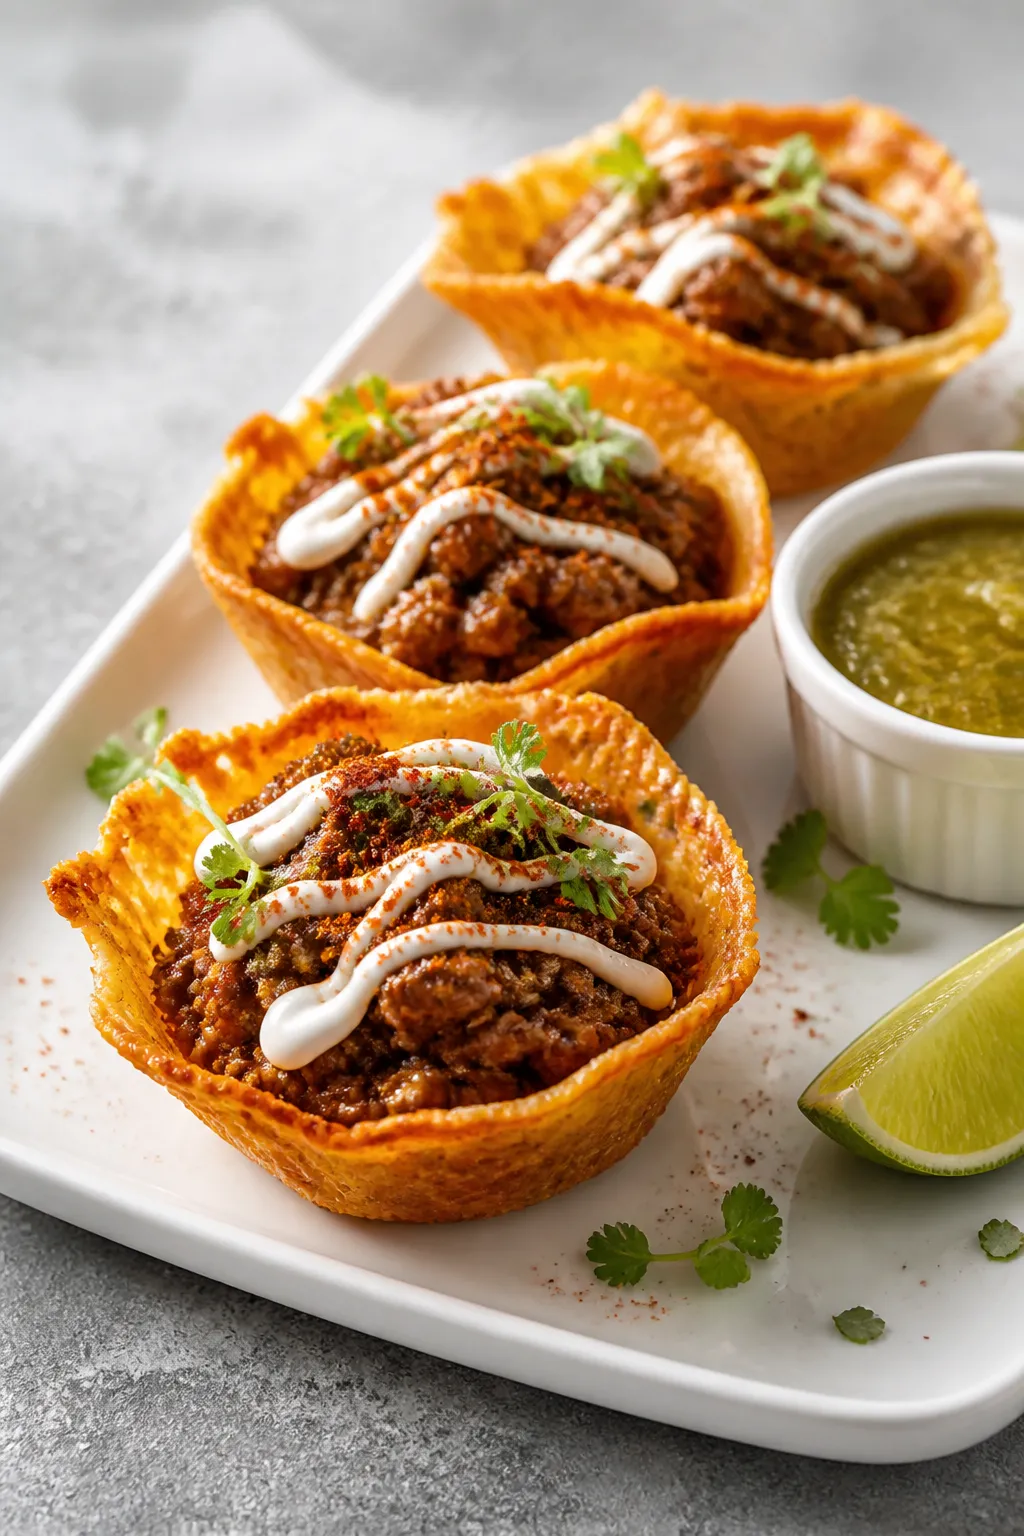
- Cook the filling: Heat a skillet over medium-high. Add the ground beef and onion. Cook, breaking up the meat, until browned and the onions are soft, about 6–8 minutes. Drain extra fat if needed.
- Season it up: Stir in garlic, taco seasoning, tomato paste, and water or broth. Simmer 2–3 minutes until thick and saucy. Season with salt and pepper.
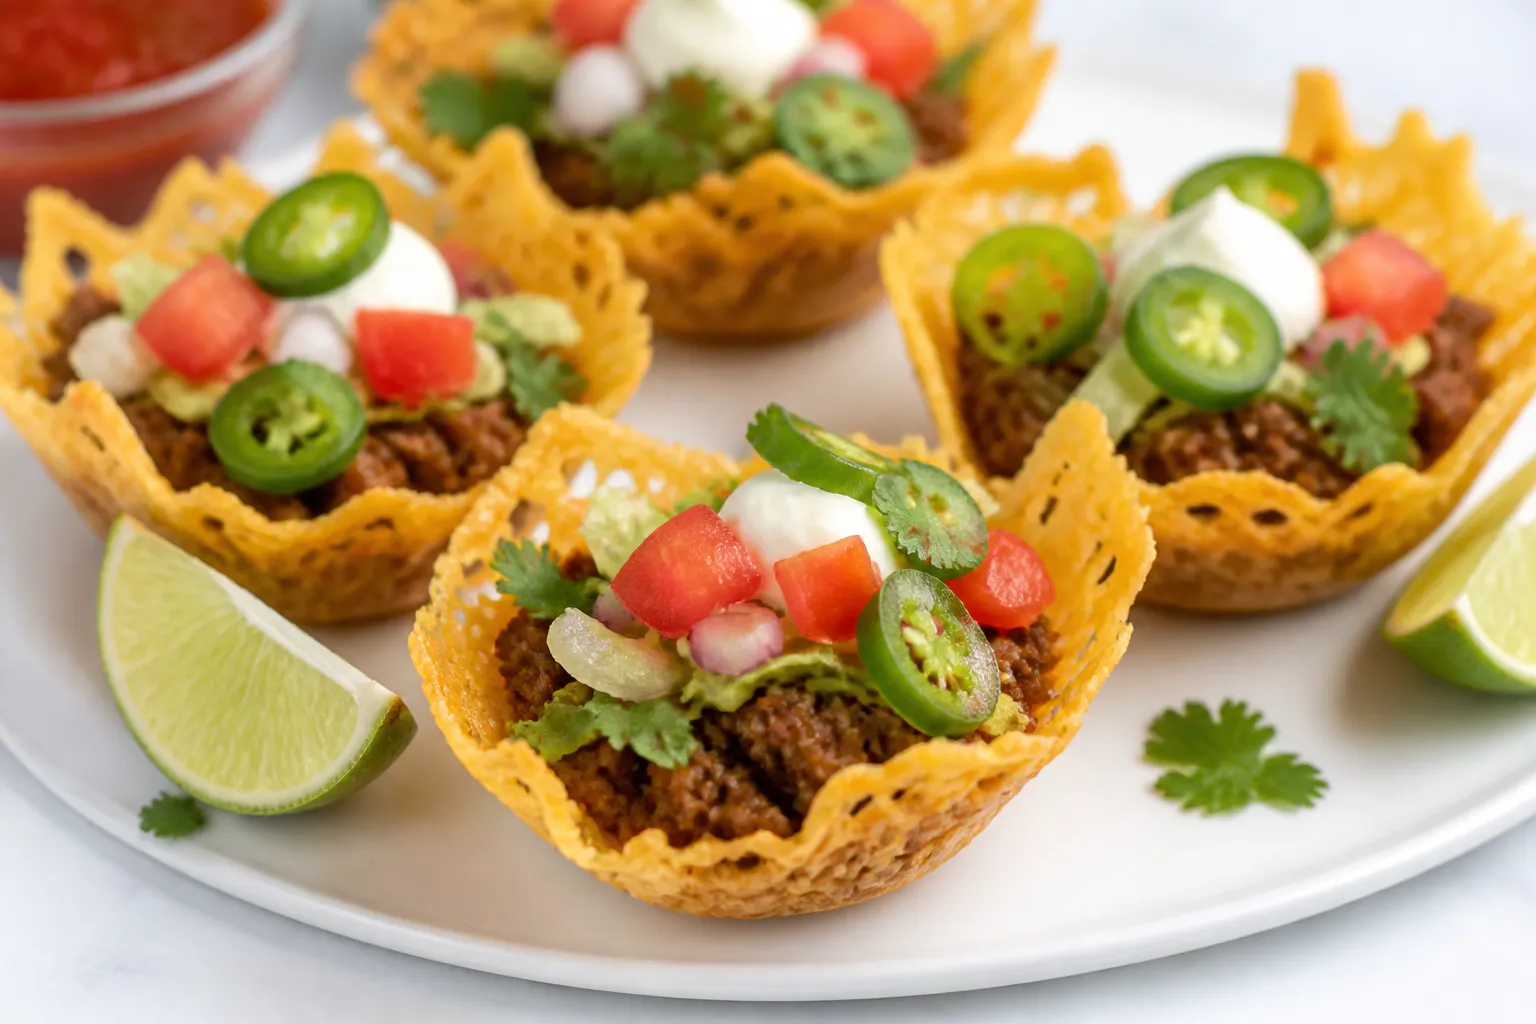
- Assemble: Gently remove cheese cups from the muffin tin. Spoon warm taco filling into each cup.
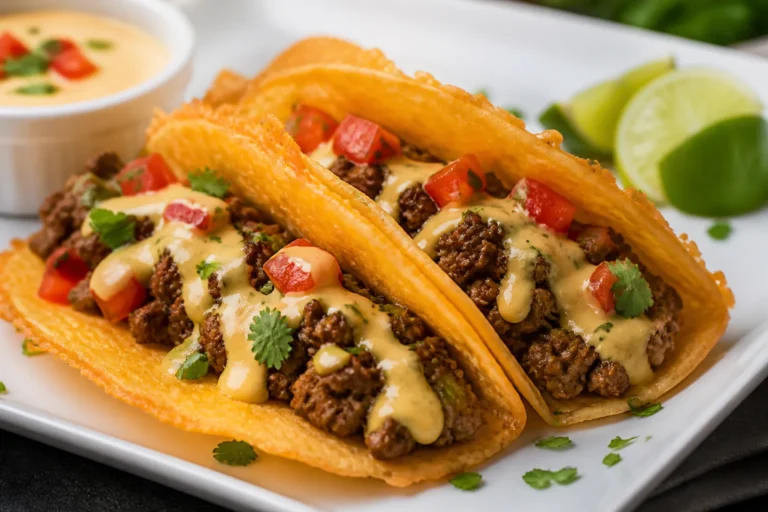
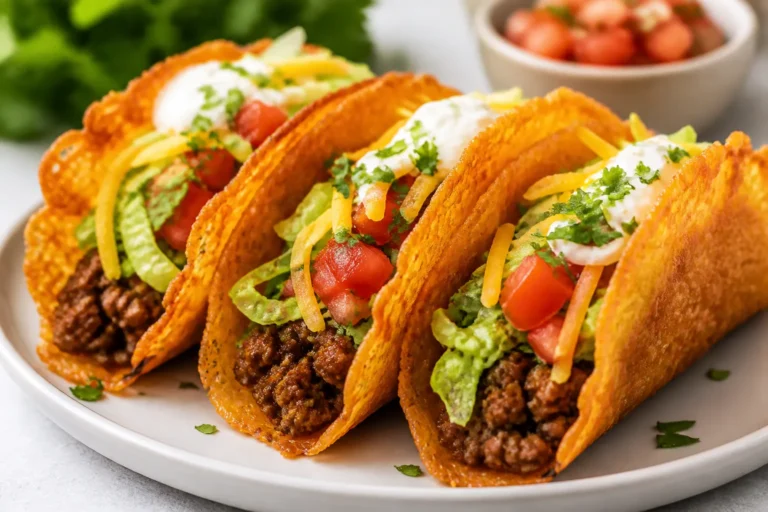
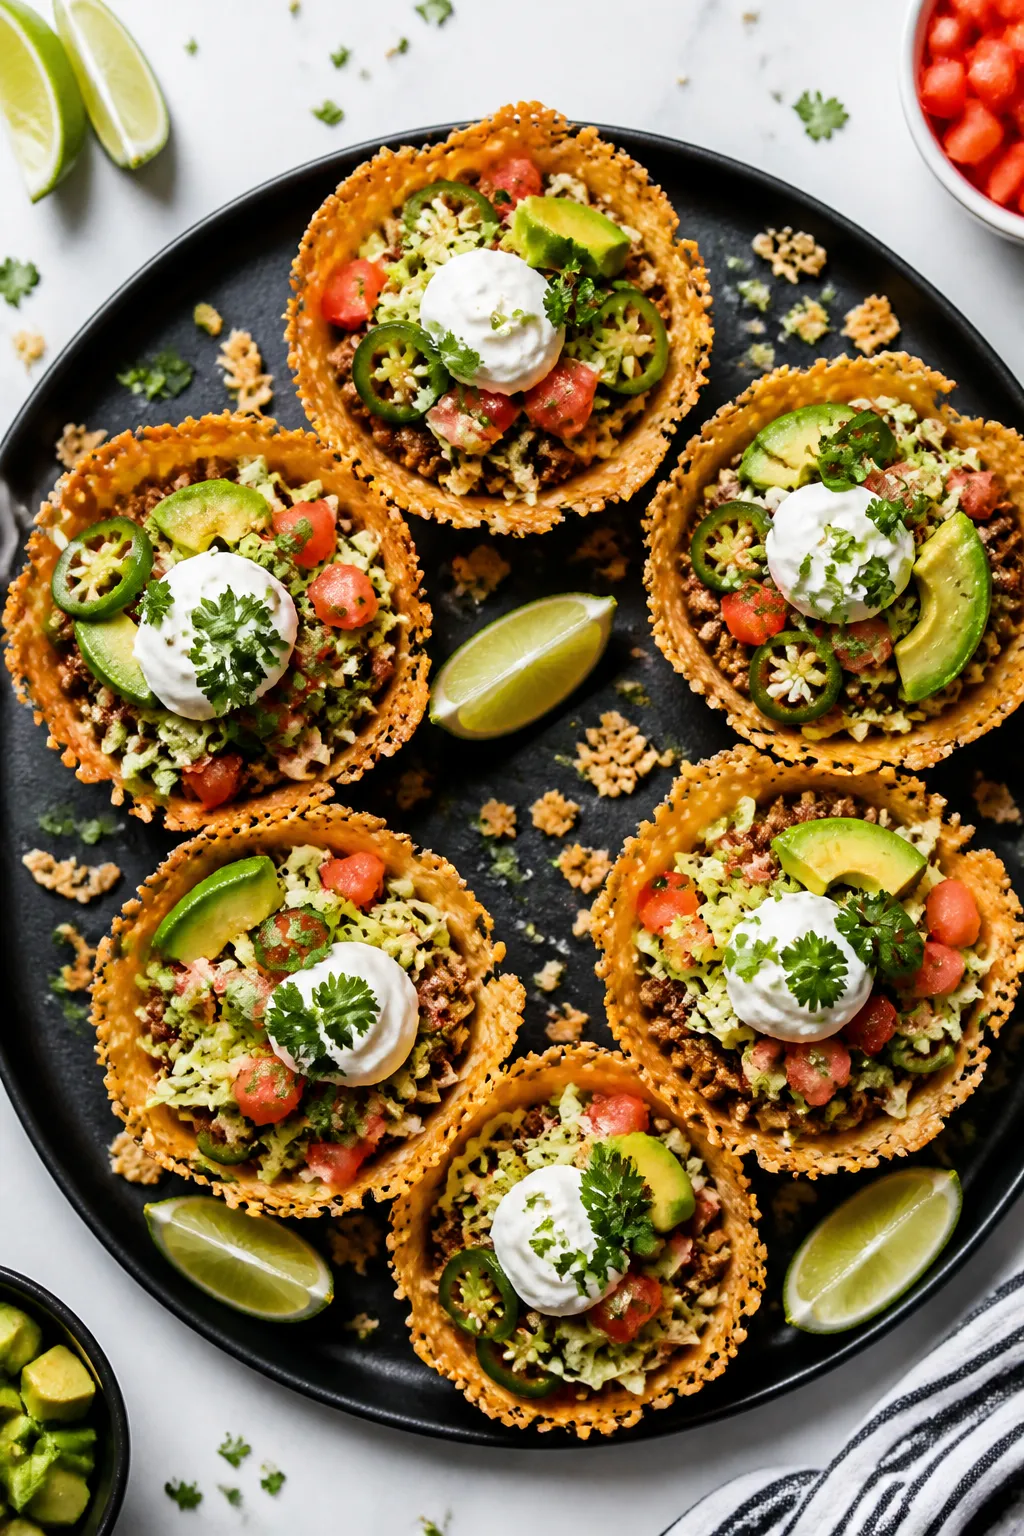
- Add toppings: Finish with lettuce, tomatoes, jalapeños, avocado, sour cream, and cilantro. A squeeze of lime wakes everything up.
- Serve: Enjoy right away while the cups are still crisp.

What Makes This Special
This recipe skips tortillas and builds the shells out of melted, baked cheese. The result is a crisp cup that holds your filling without falling apart.
It’s simple, fast, and fits a keto lifestyle without sacrificing taste. Plus, you can customize the seasoning, toppings, and even the protein to match whatever you’re craving.
- Ultra low-carb: Cheese shells replace tortillas for a keto-friendly base.
- Built-in crunch: No need for frying. Baking gives you a crispy, sturdy cup.
- Meal-prep friendly: Make the cups and filling ahead and assemble when ready.
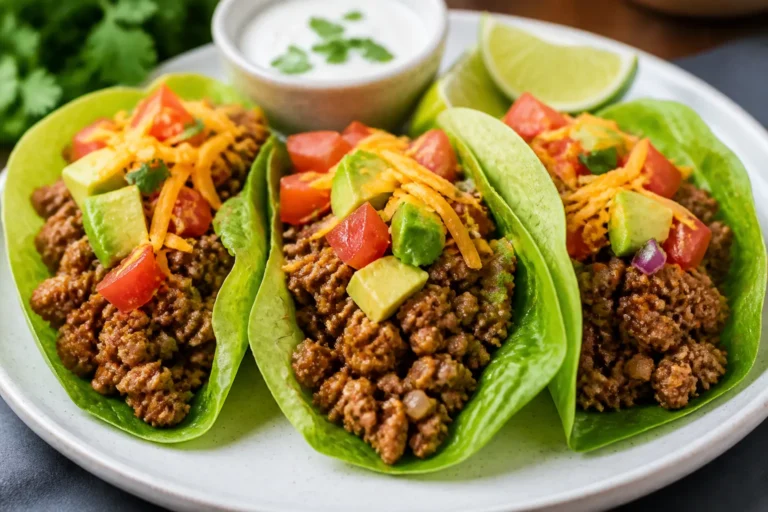
- Versatile: Swap beef for chicken, turkey, or a veggie mix without changing the method.
What You’ll Need
- For the Cheese Shells:
- 2 1/2 cups shredded cheddar or Mexican blend cheese
- Cooking spray or a little oil for the muffin tin
- For the Taco Filling:
- 1 lb ground beef (80–90% lean) or ground turkey
- 1 small onion, finely diced
- 2 cloves garlic, minced
- 2 tbsp tomato paste (optional, adds richness)
- 1/3 cup water or beef broth
- 2–3 tbsp taco seasoning (store-bought or homemade)
- Salt and pepper to taste
- Toppings (Choose Your Favorites):
- Shredded lettuce
- Diced tomatoes
- Sliced jalapeños
- Avocado or guacamole
- Sour cream
- Fresh cilantro
- Lime wedges
How to Make It
- Preheat the oven: Set it to 375°F (190°C).
Lightly grease a standard muffin tin.
- Form the cheese rounds: On a parchment-lined baking sheet, make 12 small mounds of cheese (about 2 tablespoons each). Flatten slightly into 3-inch circles.
- Bake the cheese: Bake for 6–8 minutes until the edges are deep golden and the centers are bubbly. They should look lacy and crisp around the edges.
- Shape the cups: Let the cheese rounds cool for 30–45 seconds to firm up, then quickly lift each one and press into the muffin tin wells to form cups.
Let them cool in the tin until firm.
- Cook the filling: Heat a skillet over medium-high. Add the ground beef and onion. Cook, breaking up the meat, until browned and the onions are soft, about 6–8 minutes.
Drain extra fat if needed.
- Season it up: Stir in garlic, taco seasoning, tomato paste, and water or broth. Simmer 2–3 minutes until thick and saucy. Season with salt and pepper.
- Assemble: Gently remove cheese cups from the muffin tin.
Spoon warm taco filling into each cup.
- Add toppings: Finish with lettuce, tomatoes, jalapeños, avocado, sour cream, and cilantro. A squeeze of lime wakes everything up.
- Serve: Enjoy right away while the cups are still crisp.
Keeping It Fresh
Cheese shells are best the day you make them. They’ll stay crisp for a few hours at room temperature, especially if you avoid adding wet toppings too early.
If you need to prep ahead, store the shells in an airtight container with parchment between layers. Re-crisp in the oven at 350°F (175°C) for 3–4 minutes.
Store the cooked taco meat separately in the fridge for up to 4 days, or freeze it for up to 2 months. Reheat the meat gently on the stovetop before assembling.
Add fresh toppings right before serving to keep everything bright and crunchy.
Why This is Good for You
- Low in carbs: Cheese shells replace tortillas, keeping net carbs in check for keto goals.
- High in protein: Ground beef or turkey provides satisfying protein that keeps you full.
- Healthy fats: Cheese, avocado, and sour cream deliver fats that support ketosis.
- Micronutrient boost: Lettuce, tomatoes, and cilantro add fiber, vitamin C, and antioxidants.
If you’re tracking macros, portion control is straightforward. Build your cups with measured meat and choose lighter toppings like lettuce and salsa if you want to keep calories lower while staying keto.
Common Mistakes to Avoid
- Underbaking the cheese: If the rounds are too pale, they’ll be floppy. You want deep golden edges for structure.
- Waiting too long to shape: Cheese cools fast.
If it firms up on the tray, it won’t mold into cups. Move quickly once it’s safe to handle.
- Overfilling: Piling in too much meat or wet toppings can crack the cups. Keep portions modest and layer toppings lightly.
- Using watery fillings: Skip excess liquid.
Simmer until the taco meat is thick and clingy to avoid soggy shells.
- Stacking warm cups: Trapped steam softens them. Let cool fully on a rack before storing.
Recipe Variations
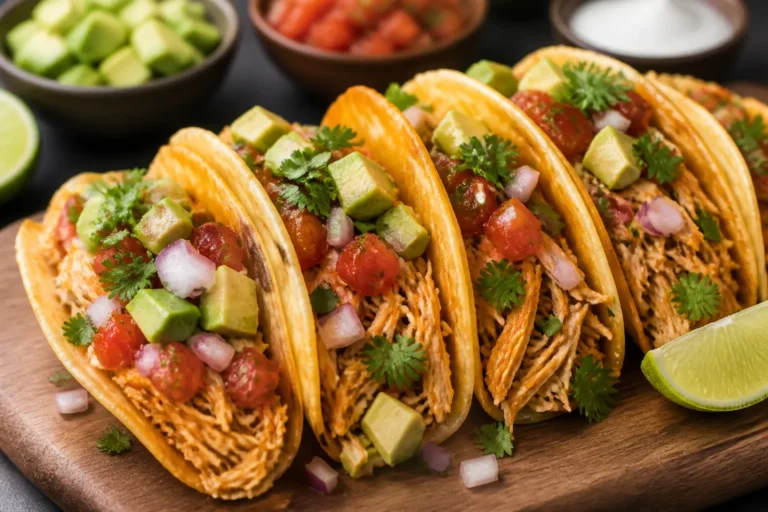
- Chicken Verde: Use shredded rotisserie chicken mixed with salsa verde and a pinch of cumin.
- Chorizo and Pepper: Brown chorizo with diced bell pepper and onion for a smoky kick.
- Turkey Taco Cups: Leaner but still flavorful. Add a splash of broth to keep the meat juicy.
- Vegetarian (Keto-Friendly): Sauté mushrooms and zucchini with taco seasoning.
Add a few walnuts for texture.
- Spice Lovers: Add chipotle powder or hot sauce to the filling. Top with extra jalapeños.
- Different Cheeses: Try pepper jack for heat or Parmesan for an ultra-crisp shell. Mix and match for flavor.
FAQ
Can I make the cheese shells in a muffin tin from the start?
It’s better to bake flat rounds on a sheet, then press them into the muffin tin while warm.
Directly baking cheese in the wells can lead to uneven melting and sticking.
What cheese melts best for the shells?
Pre-shredded cheddar or a Mexican blend works great. Monterey Jack melts smoothly but can be softer, so bake it a touch longer. Parmesan makes a very crisp but more delicate cup.
How do I keep the cups from sticking?
Use parchment on the baking sheet and lightly grease the muffin tin.
Let the cheese cool 30–45 seconds before moving it so it’s not too gooey.
Are these good for meal prep?
Yes, but store components separately. Keep shells in a sealed container at room temp for the day or refrigerated for up to 2–3 days, then re-crisp. Store the meat in the fridge or freezer and assemble just before eating.
Can I make them spicier without adding carbs?
Absolutely.
Use hot taco seasoning, add cayenne or chipotle powder to the meat, and top with fresh jalapeños or a sugar-free hot sauce.
What if I don’t have taco seasoning?
Mix chili powder, cumin, paprika, garlic powder, onion powder, oregano, salt, and pepper. Add a pinch of cayenne if you like heat.
Will mozzarella work for the shells?
Mozzarella melts well but stays a bit stretchy. Mix it with cheddar or Parmesan to add crispness and flavor.
How many cups make a serving?
Two to three cups are typical for a meal, depending on your appetite and toppings.
For appetizers, serve one to two per person.
Final Thoughts
Keto Taco Cups With Cheese Shells are simple, satisfying, and endlessly flexible. They bring the fun of taco night with none of the carb-heavy extras. Bake the shells, whip up a quick filling, and let everyone top their own.
It’s an easy win for busy nights, meal prep, or sharing with friends. Keep it crunchy, keep it bold, and enjoy every bite.
Printable Recipe Card
Want just the essential recipe details without scrolling through the article? Get our printable recipe card with just the ingredients and instructions.